Perforated Tile Placement in Data Centers: Best Practices
Perforated tile placement is one of the cheapest and most overlooked ways to improve data centre cooling. You already own the tiles. Moving them around does not require new equipment, downtime, or capex approval. Done right, it eliminates hot spots, lowers fan energy use, and lets your existing cooling plant handle more load.
Done wrong, it leaks cold air into hot aisles, starves high-density racks, and forces cooling units into overdrive. This guide covers where perforated tiles belong, where they do not, and how placement decisions change as rack density rises.
Why Tile Placement Matters
A perforated tile is just a path for cold air to leave the underfloor plenum and reach a server intake. Where you put the tile decides which servers benefit. A tile in the wrong place does not help cooling at all. It just wastes cold air.
Three things go wrong in most data centres:
- Perforated tiles end up in walkways or hot aisles because someone needed to fill a gap years ago.
- Tiles are placed evenly along a row, regardless of which racks draw the most power.
- Tiles sit right in front of cooling units, where pressure dynamics actually reduce air delivery.
Each of these wastes cold air. Stack them up across a 100-rack room and you can lose a sizeable chunk of your cooling capacity to placement alone.
The Core Rules
Rule 1: Perforated Tiles Belong in the Cold Aisle Only
This is the rule everything else builds on. Cold air should rise where servers can pull it in. That means the cold aisle, in front of rack intakes, and nowhere else.
A perforated tile in a hot aisle dumps cold air into already-warm exhaust. The cooling unit sees a return temperature that is lower than reality and reduces output. Your racks then run hotter while the CRAC eases off. The exact opposite of what you want.
A perforated tile in a walkway delivers cold air to nobody. It just lowers underfloor static pressure for every other tile in the room.
If a perforated tile is not in front of a server intake, replace it with a solid tile.
Rule 2: Match Tile Open Area to Rack Density
A standard perforated tile with 25 percent open area delivers a certain volume of air based on underfloor pressure. That volume is fine for a 3 to 5 kW rack. It is not enough for a 10 kW rack and nowhere near enough for a 15 kW rack.
Use these rough density brackets as a starting point:
- 1 to 5 kW racks: Standard perforated tile (around 25 percent open area).
- 5 to 12 kW racks: High airflow floor tile (often 56 percent open area or more).
- 12 kW and above: Directional airflow floor tile or damper panel, possibly multiple tiles per rack.
If you have a row with mixed density, mix tile types accordingly. Uniformity is not the goal. Matching supply to demand is.
Rule 3: Keep Perforated Tiles Away From CRACs
The first row of tiles in front of a cooling unit usually delivers less air than tiles further down the same aisle. The reason is pressure dynamics in the underfloor plenum. Air comes out of the CRAC at high velocity and low static pressure, so the tile closest to the unit sees less pressure than tiles 10 or 20 feet away.
A common pattern: someone installs extra perforated tiles right in front of the CRAC trying to fix a hot spot, and the hot spot gets worse because those tiles are now sucking pressure away from the rest of the row.
As a starting rule, keep perforated tiles at least one tile (and ideally two) away from the front of each cooling unit. Use solid tiles in that buffer zone.
Rule 4: Put a Solid Tile Under Every Rack
The tile directly under a rack should be solid. If it is perforated, cold air rises straight up into the bottom of the rack and either leaks out the back through gaps or shortcuts up through the rack without being pulled across the server intakes.
Solid tiles under racks force the cold air to enter through the perforated tile in the cold aisle in front, which is the path that actually does cooling work.
Rule 5: Seal Cable Cutouts Before Adding More Tiles
If a row is running hot, the instinct is to add more perforated tiles. Before you do, check the cable cutouts under the racks. An unsealed cutout can leak more cold air than a perforated tile delivers.
Sealing cutouts with brush grommets often raises underfloor static pressure enough that every existing tile in the room starts performing better. You may not need to add tiles at all. Our raised floor airflow optimization guide covers grommet sealing in detail.
Common Placement Mistakes
Mistake 1: Filling Every Square in the Cold Aisle With Perforated Tiles
More tiles is not always better. If your underfloor static pressure is low (say, under 0.05 inches of water), adding tiles further drops the pressure and reduces air delivery from every tile in the room. Sometimes the right move is to remove tiles, not add them.
Mistake 2: Identical Tiles in Front of Different-Density Racks
A 2 kW network rack and a 10 kW compute rack should not have the same tile in front of them. The network rack wastes the air; the compute rack starves.
Mistake 3: Perforated Tiles Left Behind After Layout Changes
When racks are decommissioned or moved, the perforated tile in front often stays. Now you have a perforated tile in a row with no server behind it, leaking cold air for no purpose. Audit tile placement any time the rack layout changes.
Mistake 4: Ignoring Aisle Containment
If you have cold aisle containment, your tile placement strategy changes. With containment, cold air cannot escape to hot aisles, so static pressure climbs. You may be able to use fewer perforated tiles, or smaller open areas, while still delivering the same air volume to your racks.
shop our range
-
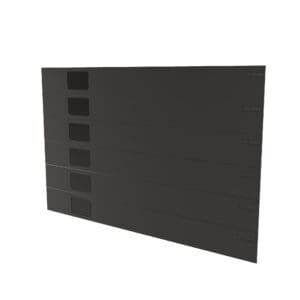
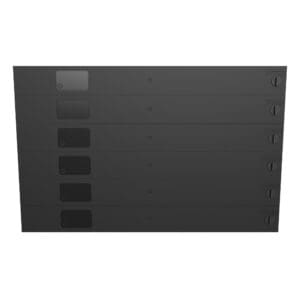
19″ 6RU Universal Blanking Panel
Price range: $186.00 through $200.00 AUD -

21″ 10SU Universal Blanking Panel for ETSI Rack
Price range: $240.00 through $250.00 AUD -
23″ 6RU Universal Blanking Panel
$250.00 AUD -
19” 6RU Standard Blanking Panel
Price range: $145.00 through $186.00 AUD -
New 19″ 6RU Universal Blanking Panel
A Quick Placement Audit
You can do a basic audit in an afternoon:
- Walk every aisle. Note every perforated tile and what is in front of it (rack, walkway, hot aisle, CRAC).
- Note the kW draw of each rack across from a perforated tile.
- Replace any perforated tile not in front of a server intake with a solid tile.
- Match tile type to rack density: standard, high airflow, or directional.
- Check cutout sealing under each rack.
- Re-measure underfloor static pressure after changes.
Most sites see measurable temperature changes the same day. Energy savings show up on the next CRAC run report.
Pair Placement With the Right Tools
Tile placement is one lever. The others are tile choice and damper control. Configuring floor tile dampers lets you fine-tune individual tile output, which is especially useful in high-density zones where placement alone cannot deliver the air volume you need.
For the full sequence (placement, sealing, dampers, and right-sized tiles), see our complete raised floor optimization guide.
Ready to Audit Your Tile Layout?
If your data centre is running hot or your cooling costs are climbing, tile placement is one of the first places to look. Contact EziBlank for advice on floor tile selection and layout for your facility.