How to Install EziBlank Blanking Panels: Tool-Free Guide
Installing blanking panels should not require a maintenance window, a toolkit, or a second pair of hands. EziBlank panels use a snap-on modular design that lets a single technician seal open rack spaces in seconds, with no tools, no cage nuts, and no downtime. This guide walks through the full installation process for every panel type in the EziBlank range.
Before You Start: What You Need
EziBlank panels arrive as 6RU blocks (or 10SU for ETSI racks). Each block snaps apart into individual 1U segments, so you can fill any number of open rack units from a single panel.
Here is what you need before installation:
- EziBlank blanking panels matched to your rack width (19-inch, 21-inch, or 23-inch)
- A count of open U-spaces per rack (walk the floor or pull a rack elevation report)
- Access to the front of each rack
- Optional: Rack Studs fasteners for racks with damaged or missing cage nut holes
That is it. No screwdrivers. No cage nuts. No rail adapters.
Step 1: Count Your Open U-Spaces
Walk each rack row and count the empty rack units that are not occupied by equipment, patch panels, or cable management. Every open U-space is a source of hot air recirculation and wasted cooling energy.
A standard 42U rack with 30U of installed equipment has 12U of open space. That requires two 6RU EziBlank panels. For a 100-rack facility averaging 10U of open space per rack, you need roughly 167 panels (1,000U divided by 6RU per panel).
Record the count per rack or per row. This helps you distribute panels efficiently during installation rather than making multiple trips back to storage.
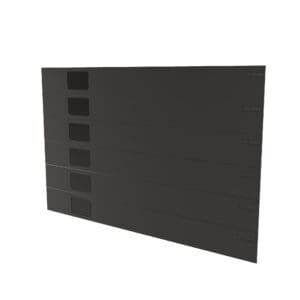
Step 2: Break the 6RU Panel to Size
Each EziBlank panel ships as a single 6RU block. To fill smaller gaps, snap the panel apart at the 1U joints. The joints are scored for clean separation. Grip the panel on either side of the joint and bend gently until it separates.
Need 4U of coverage? Snap a 6RU panel into a 4U piece and a 2U piece. Both pieces remain fully functional and can be installed independently. Need 1U? Snap off a single unit from the end of the block.
The remaining segments are not waste. Store them for future use. EziBlank panels snap back together into larger blocks when needed, so a leftover 2U piece today becomes part of a 6U fill tomorrow.
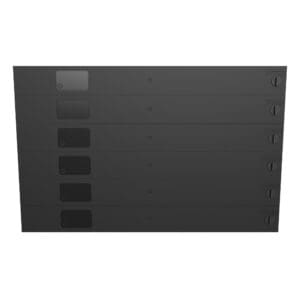
Step 3: Position the Panel on the Rack Rail
Hold the panel in front of the open U-space with the snap clips facing the rack rail. Align the top edge of the panel with the top of the U-space you want to fill.
For the Standard panel (square-hole rails only): line up the panel clips with the square mounting holes on both sides of the rail.
For the Universal panel (square-hole, round-hole, or threaded-hole rails): the flexible clip mechanism adapts automatically. Position the panel the same way regardless of rail type.
The panel should sit flush against the front plane of the rack, covering the full width of the open space between the left and right mounting rails.
Step 4: Snap the Panel Into Place
Press the panel firmly toward the rack. The snap clips engage the rail holes and lock the panel in position. You will feel and hear a click when the panel seats correctly.
Apply even pressure across the panel. On a 6RU block, press at the top, middle, and bottom to seat all clips simultaneously. On a 1U or 2U segment, a single firm push is enough.
The entire process, from positioning to locked installation, takes less than 10 seconds per panel. A technician can fill a 42U rack in under two minutes.
Step 5: Verify the Seal
After installation, check that the panel sits flush with no gaps along the top, bottom, or sides. Run your hand along the edges. You should feel no airflow leaking through or around the panel.
If a panel feels loose, remove it and re-seat it with firmer pressure. The clips are designed for repeated insertion and removal without wearing out.
For racks in hot aisle/cold aisle containment configurations, a proper blanking panel seal is critical. Even small gaps allow hot exhaust air to recirculate into the cold aisle, reducing cooling efficiency and creating thermal hotspots on adjacent equipment.
shop our range
-
19″ 6RU Universal Blanking Panel
Price range: $186.00 through $200.00 AUD -

21″ 10SU Universal Blanking Panel for ETSI Rack
Price range: $240.00 through $250.00 AUD -
23″ 6RU Universal Blanking Panel
$250.00 AUD -
19” 6RU Standard Blanking Panel
Price range: $145.00 through $186.00 AUD -
New 19″ 6RU Universal Blanking Panel
Removing and Repositioning Panels
When you add or move equipment, EziBlank panels come out as quickly as they go in. Grip the panel at the top and bottom edges and pull straight out from the rack rail. The clips disengage cleanly without damaging the rail or the panel.
Removed panels can be reinstalled immediately in a different location, snapped back together into larger blocks, or stored for future use. There is no wear-and-tear penalty for repeated installation cycles. This is a significant advantage over traditional metal filler plates, which require cage nuts and screws for every move and often bend or scratch during removal.
Installation Tips for Large Deployments
When rolling out blanking panels across an entire facility, a few practices speed up the process:
Work row by row, not rack by rack. Load a cart with panels for an entire row, walk the row from one end to the other, and fill every open space in sequence. This minimizes back-and-forth trips and keeps the installation moving.
Start from the top of each rack. Hot air rises, so the highest open U-spaces contribute the most to recirculation. If you are deploying in phases (filling the most critical racks first), prioritize the top U-spaces in each rack before moving to lower positions.
Use the Universal panel as your default. In mixed environments where rail types vary between cabinets, the universal blanking panel eliminates the risk of arriving at a rack with the wrong panel type. The price difference per panel is small compared to the time cost of returning to storage for a different model.
Pair with Rack Studs for damaged rails. If rack rails have stripped or damaged mounting holes, Rack Studs fasteners provide an alternative anchor point that works with EziBlank’s snap-on design.
Track what you install. For facilities using asset management or DCIM software, log the blanking panel deployment per rack. This data feeds into airflow audits and cooling capacity planning.
What About Racks That Are Not Standard?
EziBlank covers the three main rack widths used globally: 19-inch (IT standard), 21-inch (ETSI/telco standard), and 23-inch (legacy). If your facility uses a non-standard or proprietary rack format, EziBlank offers tailor-made solutions with custom panel dimensions built to your specifications.
For any questions about panel sizing, quantity planning, or large-scale deployment logistics, contact the EziBlank team directly.
Frequently Asked Questions
Do I need any tools to install EziBlank panels?
No. Every EziBlank panel uses a tool-free snap-on mechanism. There are no screws, cage nuts, or clips to manage. Installation and removal are done entirely by hand.
Can I install panels while the rack is live?
Yes. EziBlank panels snap into place from the front of the rack without touching any installed equipment. There is no risk to running servers, switches, or cabling during installation. No downtime is required.
How long does it take to fill a full rack?
A single technician can fill a 42U rack with blanking panels in under two minutes. For a 100-rack facility, expect a full deployment to take one technician roughly half a day.
Will the panels damage my rack rails?
No. The snap clips are made from the same flame-retardant ABS as the panel body. They grip the rail without scratching, bending, or deforming the mounting holes. Panels can be installed and removed repeatedly without rail damage.
Can I cut the panels to fit non-standard sizes?
EziBlank panels snap apart at scored 1U joints, so they fill any whole-number U-space. For fractional or non-standard dimensions, contact EziBlank about tailor-made solutions.