Raised Floor Airflow Optimization: A Complete Guide
A raised floor is more than a place to hide cables and pipes. In a data centre, it is the delivery system for every cubic foot of cold air that reaches your servers. When the raised floor is optimized, cooling units run at lower fan speeds, hot spots disappear, and your power bill drops. When it is not, you waste cold air, fight thermal alarms, and add cooling capacity you do not actually need.
This guide walks through the four levers that decide whether a raised floor works for or against you: tile selection, tile placement, grommet sealing, and damper configuration.
Why Raised Floor Airflow Matters
Most data centre raised floors were designed for one job: push cold air up through the perforated tiles in front of the racks, let the servers pull it through, and return the warm exhaust to the cooling units. The physics is simple. The execution is where most sites struggle.
In a typical mid-density data centre, between 20 and 40 percent of the cold air leaks out through gaps before it ever reaches a server intake. That leakage drives bypass airflow and recirculation, which forces cooling units to work harder to hit the same setpoint. Fix the raised floor and you fix the root cause, not the symptom.
A well-optimized raised floor delivers three results:
- Cold air arrives where it is needed, at the volume the racks demand.
- Hot exhaust returns cleanly to the cooling units without mixing.
- Cooling unit fans run lower, cutting energy use without sacrificing safety.
The Four Levers of Raised Floor Optimization
1. Pick the Right Tile for the Load
Not every rack needs the same airflow. A 3 kW network rack with a few switches has very different needs from a 15 kW compute rack stacked with GPUs. Using the same standard perforated tile in front of both is a common mistake.
Three tile types cover most scenarios:
- Standard perforated tiles: Suited to low- and medium-density racks (up to around 5 kW). Open area is typically 25 to 56 percent. Cold air rises in a wide, low-velocity pattern.
- High airflow floor tiles: Designed for higher-density racks (5 to 12 kW). Larger open area and engineered grills push more CFM through the same tile footprint. The high airflow floor tile is built for this load range.
- Directional airflow tiles: Aim the cold air toward server intakes rather than letting it disperse. The EziBlank directional airflow floor tile directs flow specifically at the rack face, which matters in tight aisle configurations.
For very high-density zones (12 kW and above), a directional airflow damper panel gives you control over both volume and direction at the tile level.
2. Place Tiles Where the Load Actually Is
Perforated tile placement decides which racks get cold air and which racks get starved. The rules are not complicated, but they are easy to ignore once a layout has been in place for years.
The basics:
- Perforated tiles belong in the cold aisle, in front of rack intakes. Nowhere else.
- A solid tile under the rack itself stops air from escaping uselessly underneath.
- Tiles directly in front of cooling units cause static pressure problems. Keep them at least one tile away.
- The first tile in a cold aisle (closest to the CRAC) often delivers less air than tiles further down the row because of pressure dynamics. Match tile open area to the load, not to a uniform pattern.
For a detailed walkthrough of where each tile type should go, see our guide on perforated tile placement best practices.
3. Seal Every Cable Cutout
Cable cutouts under racks are the single biggest leak point in most raised floors. A standard 4-inch by 12-inch rectangular cutout can leak more cold air than a perforated tile delivers. If you have 30 racks, that is potentially 30 large leaks pulling cold air away from your servers.
Brush grommets fix this. KOLDLOK raised floor grommets seal around cables while still letting you add or remove them, so you keep flexibility without sacrificing pressure. For smaller cutouts and grommet replacement, aluminium floor grommets give you a durable, drop-in option.
Sealing cable cutouts often delivers a measurable rise in under-floor static pressure within hours of installation. That extra pressure pushes more cold air through the tiles where you actually want it.
4. Tune Dampers in High-Density Zones
A damper sits under a perforated or directional tile and lets you throttle airflow at the individual tile level. This matters because static pressure under a raised floor is not uniform. Tiles in some spots over-deliver. Tiles in others starve.
Dampers let you balance the floor without ripping up tiles or moving cooling units. In high-density zones, they let you push more air to the racks that need it most. Our guide on configuring floor tile dampers for high-density zones walks through the steps.
shop our range
-
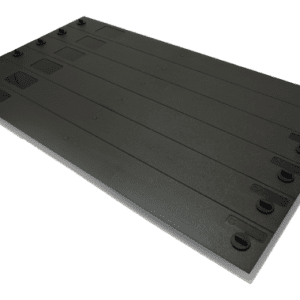
19″ 6RU Universal Blanking Panel
Price range: $186.00 through $200.00 AUD -

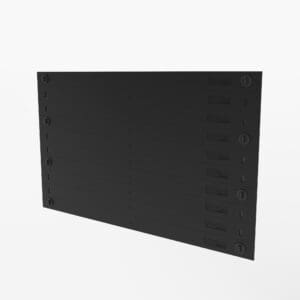
21″ 10SU Universal Blanking Panel for ETSI Rack
Price range: $240.00 through $250.00 AUD -
23″ 6RU Universal Blanking Panel
$250.00 AUD -
19” 6RU Standard Blanking Panel
Price range: $145.00 through $186.00 AUD -
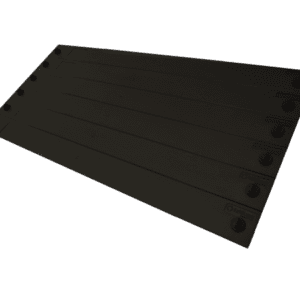
New 19″ 6RU Universal Blanking Panel
Putting It Together: A Simple Optimization Sequence
If you are working through an existing raised floor, follow this order:
- Map the load. Note the kW draw of each rack. Mark high-density zones.
- Audit the tiles. Count perforated tiles, note their location, and check whether they line up with cold aisles in front of high-load racks.
- Check for leaks. Walk the floor looking for unsealed cable cutouts, gaps under racks, and tiles placed in walkways or hot aisles.
- Reseal what leaks. Replace open cutouts with grommets. Swap perforated tiles in the wrong locations for solid tiles.
- Right-size the tiles. Move standard tiles to low-density rows. Put high airflow or directional tiles in front of high-density racks.
- Add dampers where needed. In dense zones, use dampers to fine-tune air delivery.
- Measure under-floor static pressure. Confirm the changes increased it. Adjust CRAC fan speeds where safe.
A round of these steps often pays back inside a single quarter through lower cooling energy use alone.
Ready to Optimize Your Raised Floor?
Whether you are dealing with hot spots, rising energy bills, or planning a high-density expansion, the right combination of tiles, grommets, and dampers makes a measurable difference. Contact EziBlank to talk through your raised floor setup with our team.
Frequently Asked Questions
What is the goal of raised floor airflow optimization?
The goal is to deliver cold air to the racks that need it, at the volume they need, with as little waste as possible. This lowers cooling energy use, eliminates hot spots, and lets cooling units run at lower fan speeds.
How much cold air does a typical raised floor leak?
In most mid-density data centres, 20 to 40 percent of cold air leaks out before reaching a server intake. The biggest leak points are unsealed cable cutouts and perforated tiles placed outside cold aisles.
Do I need different floor tiles for different rack densities?
Yes. Standard perforated tiles suit racks up to around 5 kW. High airflow tiles handle 5 to 12 kW. Directional tiles and damper panels are designed for higher-density loads where airflow needs to be aimed at specific intakes.
Are floor grommets worth the cost?
Almost always. A single unsealed cable cutout can leak more cold air than a perforated tile delivers. Sealing the cutouts with brush grommets restores under-floor pressure, which improves air delivery across the whole row.